Page 6 of 9
Re: CH 701
Posted: Thu Jul 31, 2014 9:03 am
by Henni
Tx mate,
Really looking forward to those pics.
Cheers,
Henni
Re: CH 701
Posted: Thu Jul 31, 2014 9:57 am
by Z-MRP
Re: CH 701
Posted: Thu Jul 31, 2014 12:30 pm
by Henni
Wow!
Great stuff. Very enlighting.
Thank you so much my kind friend,
Henni
Re: CH 701
Posted: Tue Aug 05, 2014 9:57 pm
by Z-MRP
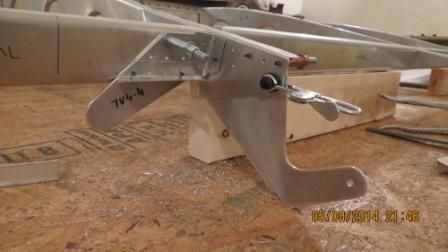
- 78 Rear Upper strut bracket-flaperon bracket.jpg (29.72 KiB) Viewed 11046 times
Fitted (wing assembly still at cleco stage) 4 flaperon brackets and the rear upper strut bracket.
Re: CH 701
Posted: Mon Aug 11, 2014 1:16 pm
by Z-MRP
Just finished fitting all the rear/fuel tank channels within the wing frame. As this is plans build am doing the first of 2 upgrades.This first upgrade is to extend the height of the cabin roof from flat to curved.Known as the Beannie Mod.
Have cut the wooden form bloks to make these new wing root ribs. Will post photos soonest.
Re: CH 701
Posted: Tue Aug 26, 2014 8:46 pm
by Z-MRP
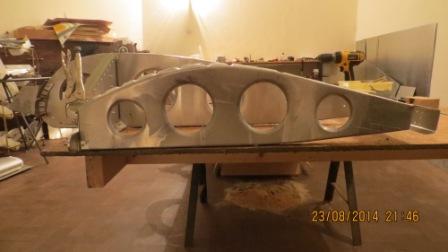
- 79B Beannie mod root rib in position.jpg (27.25 KiB) Viewed 10973 times
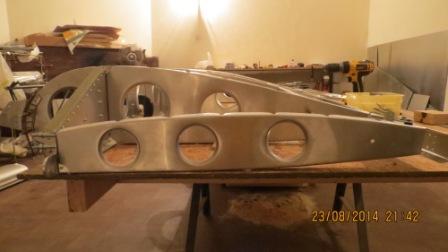
- 79A Std root rib in position.jpg (27.51 KiB) Viewed 10973 times
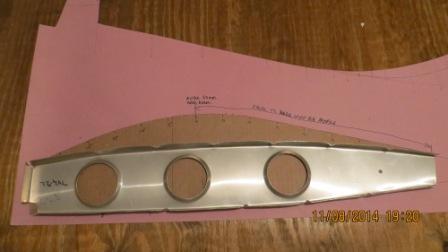
- 79 Std root rib against Beannie mod root rib pattern.jpg (24.9 KiB) Viewed 10973 times
Having now finished the design of the beannie mod root rib,made up the wooden form bloks to produce the 2 new root ribs.Net result is 60mm extra head room and an extra section of lift surface to add to the wing area.
here with the photoas of this mod.
Re: CH 701
Posted: Thu Aug 28, 2014 8:30 pm
by Goose
Z-MRP wrote:Net result is 60mm extra head room and an extra section of lift surface to add to the wing area.
With that extra lift you can shorten the runway by 50m

Groete
Goose
Re: CH 701
Posted: Fri Aug 29, 2014 11:56 am
by Z-MRP

No need to have the plane at the flying club now, can just launch straight out my back garden

Re: CH 701
Posted: Sun Aug 31, 2014 8:52 pm
by Z-MRP
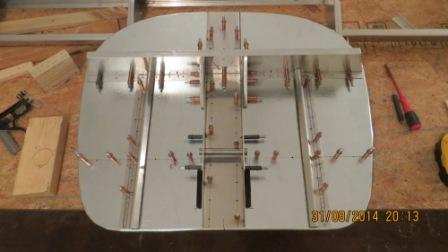
- 80 Firewall Assembly.jpg (27.93 KiB) Viewed 10861 times
Took a break from working on the wing. Made up the firewall from scratch this weekend.
Re: CH 701
Posted: Wed Sep 03, 2014 1:18 pm
by Z-MRP
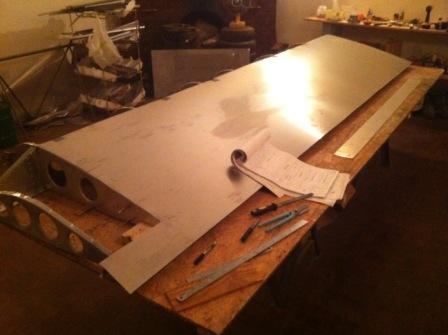
- 81 Right Wing top skin.jpg (25.13 KiB) Viewed 10815 times
Made a start on making up the first wing top skin.Quite tricky to get it into position and then mark all the lines to pre drill and make sure the lines actually line up with the ribs come time to rivet. Lots of double checking and treble checking here before drilling.
Re: CH 701
Posted: Sun Oct 12, 2014 10:24 am
by Z-MRP
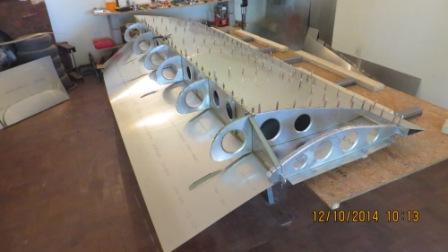
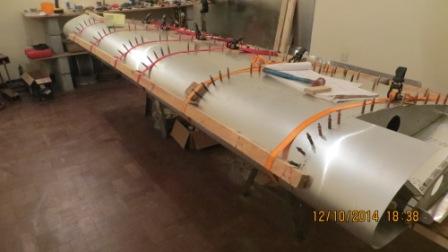
- 81B Right Wing nose skin fitted.jpg (27.97 KiB) Viewed 10719 times
- 81A Right Wing nose skin.jpg (28.82 KiB) Viewed 10719 times
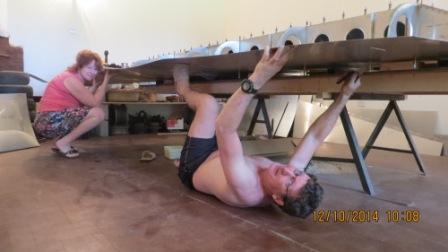
Update on construction right wing. Lots of slow work drilling de burring, all that done now. Lower skin riveted into position.Nose skin in position and ready for fitting.Top skin remains clecoed as I have to still fit the std fuel tank plus the long range tank.
Wing definetly needs extra hands so was lucky to have my willing and able assistant assist to fit the nose skin after turning the wing over on the bench.
Re: CH 701
Posted: Sun Oct 12, 2014 6:52 pm
by Z-MRP
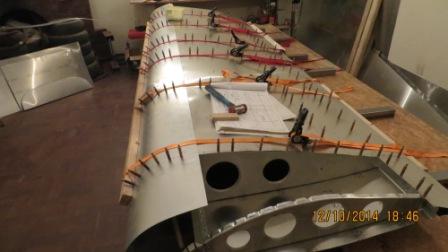
- 81C Nose skin in position with tension straps.jpg (30.03 KiB) Viewed 10704 times
- 81D Nose skin clecoed in position.jpg (27.15 KiB) Viewed 10704 times
Nose skin in place drilled and cleo. Took alot of fiddling to get all centre lines to line up with pre drilled holes in the nose skin but its done and the slat slots have lined up nicely as well. Just have to increase clearance on the slots so slat bracket doesnt rub on the nose skin.
Re: CH 701
Posted: Sun Oct 12, 2014 8:57 pm
by Goose
Looking good
Re: CH 701
Posted: Thu Oct 23, 2014 3:28 pm
by scorpion
Hey Guy,
You have my utmost admiration and are doing a fantastic job on your plane. I fly an Oribi with a 582 Rattex and it has more than enough grunt for recreational flying. I offer this comment because as you know the two aircraft types are very similar. I did take off the leading edge slats and replaced them with vortex generators which has made a big improvement in the fuel consumption figures.
Chris
Re: CH 701
Posted: Fri Oct 24, 2014 1:31 pm
by Z-MRP
Thx Chris appreciate the heads up on the slats. I have made the slats and will fit them as a starting point. Can tinker later on once the plane has pasted proving flight time.
Slats, 912 100hp, whirlwind 3 blade prop should perform like a rocket even at hot and high.
Removed the first wing from the work bench this morning so 2nd wing assembly will start this weekend. First wing safely stored in the lounge on a large tresle table.Will post a pic this weekend.